Remove an OEM or EISA Partition
In principle, formatting an OEM or EISA partition is impossible. Even through the disk manager right click and delete .. on the partition does nothing;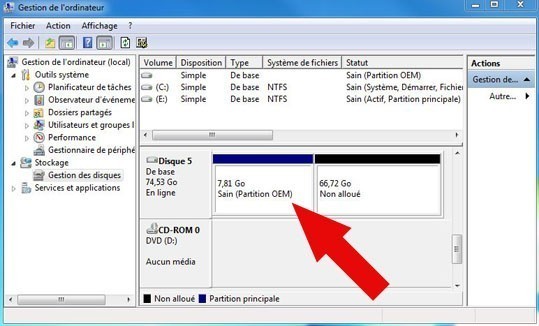

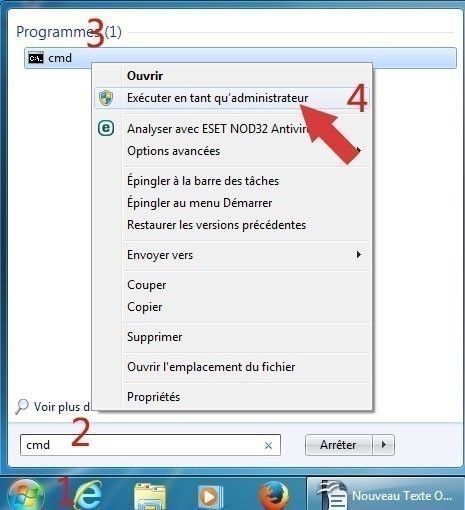
1st method of OEM / EISA partition removal: But using the command console you can do it without much hassle.For this, first open the DOS command. Start (1) then in search or run type "cmd" (2) and when cmd appears in the menu, right click (3) on it and then run as administrator (4).

Then type diskpart and then enter your keyboard.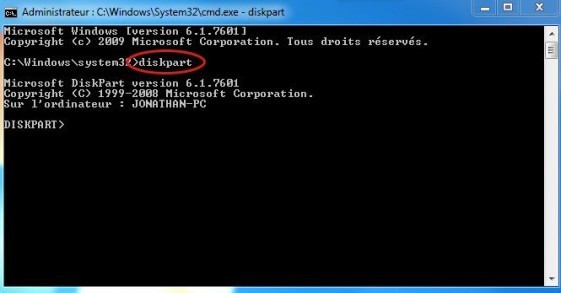

Now that you are in the diskpart program, type " rescan " again and then enter your keyboard: The utility will start searching for the disks and partitions of your computer.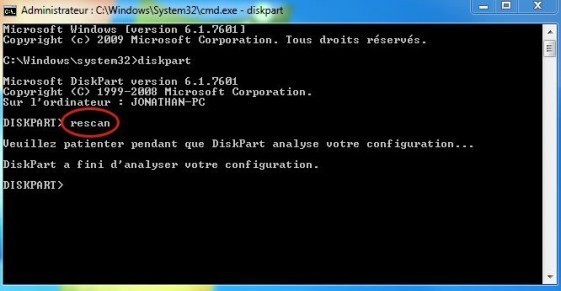

Now we will choose a disk and then the partition to format: Select disk: Type " list disk " then validate with enter the keyboard to display the list of available hard disks on your computer: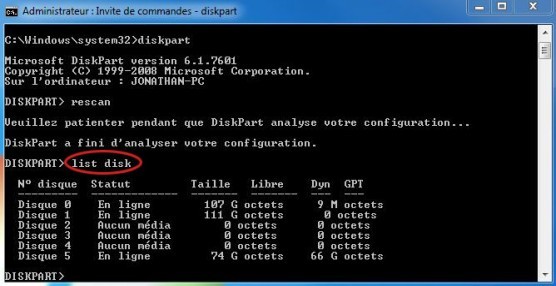

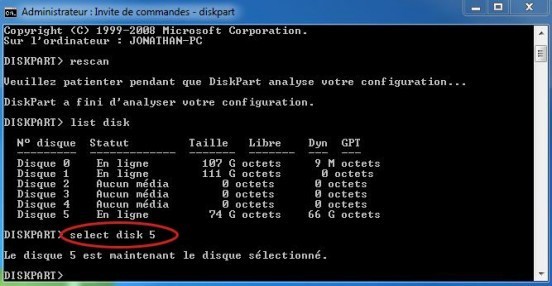
Now you will select the disk containing the partition to delete. Type " select disk " then the disk number "and then tap Enter . For example: select disk 1
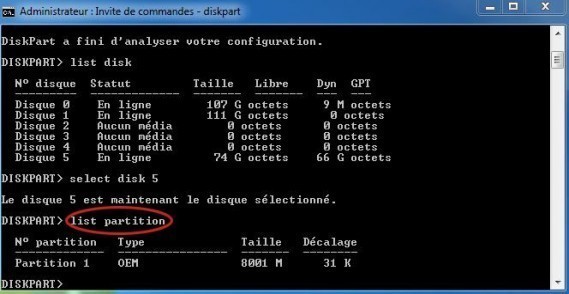
 Selecting the partition: Then type " list partition " and then Enter to display the available partitions on the selected hard disk.
Select the partition to be deleted by typing " select partition 1 " for example to select partition 1. Same as for disk select the number according to the list and the EISA or OEMpartition to be deleted, then tap Enter .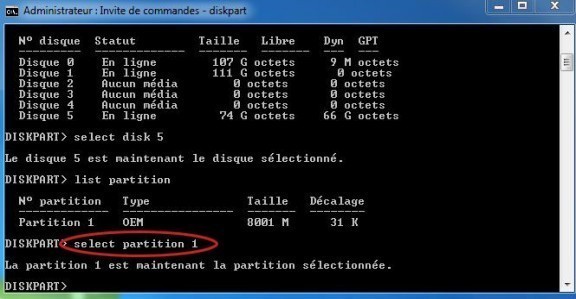

Finally type " delete partition override " and type Enter . You can exit the command window, your partition is deleted.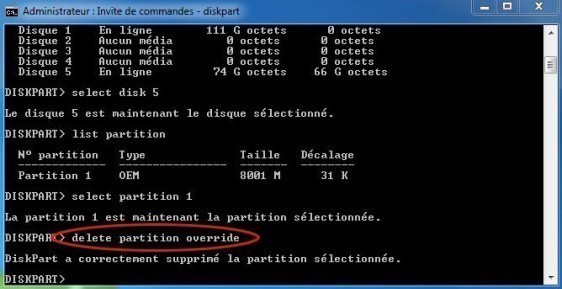 2nd method of OEM / EISA partition deletion: If the first method is too complicated, then take a windows installation cd, and do as if you were going to install the system. Then when the program asks you to select a disk for the first time installation choose the OEM or EISA partition to delete and have it removed . As in the picture below.
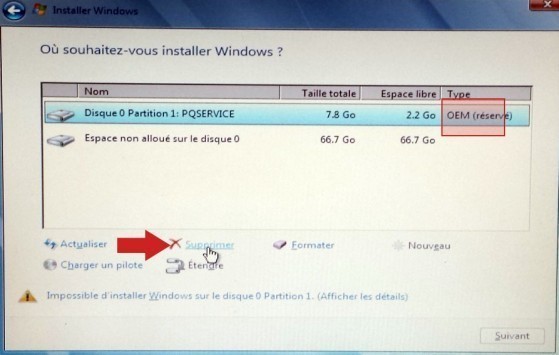 Once the partition is removed, remove the cd and reboot the pc. This method is simpler but requires a windows installation cd, or linux.
 2nd method of OEM / EISA partition deletion: If the first method is too complicated, then take a windows installation cd, and do as if you were going to install the system. Then when the program asks you to select a disk for the first time installation choose the OEM or EISA partition to delete and have it removed . As in the picture below.
 Once the partition is removed, remove the cd and reboot the pc. This method is simpler but requires a windows installation cd, or linux.


![[Darknet] How I Discovered It, and How to Access](https://blogger.googleusercontent.com/img/b/R29vZ2xl/AVvXsEigkvDILsG9sBTqEktFANKPS5HYpz1I4Cn00RhSPezewjQjxnKrznkJmBvWUnLHTrH_5_OibNQhzXA1HoPOKuhMOWkc5kaeA4QKpx5t24CS8rdr8YPqUGT4t8HogBdnS7Txj8p9AQZU7I0/s72-c/%255BDarknet%255D-How-I-Discovered-It%252C-and-How-to-Access.png)
Post a Comment