Canvas 3D (WebGL) Easier with Three.js
 easier with Three.js")
We've all seen sites of major brands we with full view with interactive 3D animations, or technology demonstrations that make dream. We think here of a few perfectly modelled German sedans that it is possible to inspect all angles with a simple mouse movement... Often developed in Flash with Papervision3D library these animations throw a max, but remain dependent on the plug-in from Adobe which is less and less popular and "inconsistent" Tablet and smartphone.
Today the trend is to HTML5 and CSS3, sprinkled with a bit of JavaScript. O luck, W3C and its contributors have just planned to spend by Canvas (which can already draw on a web page in 2D) to exploit a 3D with the web standards scene.
How and for whom?
For those who don't know, there are two components HTML5 to draw:
- Canvas, which allows to make the drawing (in pixel) bitmap
- SVG for vector drawing, often used in cartography (with the exception of Google Maps or OpenStreetMap using mosaics of images)
I will not dwell on these components, the web is full of topics already talking very well.

There is actually a third component which is dedicated to 3D, it's WebGL based on the 3D OpenGL standard. It allows to exploit the graphics card drivers and thus take advantage of hardware acceleration, a major asset for performing renditions of forms and complex textures. Wholesale WebGL to generate a 3D rendering calculated by the graphics card in your browser. As: This lazy of graphics card that is not used much for the rendering of a Web page is finally going to be helpful.
Only what you know, it's like with a lot of new features in HTML5, there are still restrictions to the implementation of these standards by browsers.
So maybe I'll cool the ardor of some; WebGL is supported by:
- Firefox from version 4.
- Chrome from version 9;
- Only if active Safari from the menu development;
- Internet Explorer from version 11 only
Mobile, often subject to more constraints in energy saving already recognize most these instructions via the embedded engines, but they are disabled by default. And as this is not not very encouraging, but there is the better since Microsoft went, must be added to this that some video cards do not support WebGL. This is particularly the case on some Mac models.
Good good good... then why I speak of it if obviously we can't use it yet in production right now? And already, because like many things made by HTML5 is fun and in the near future it will become viable production. And because it doesn't hurt to have a little fun with the new techno on innovative projects. Because innovation is the progress and it's good for the economy!
And the little chef's surprise is that we can still do some WebGL 3D! And Yes, because the 3D finally it's still 2D drawing to which one adds a perspective (how it I simplified a little too?). In fact, you can use Canvas and SVG to draw 3D.
Then I assure you, it is not about fun things to do scholarly databases matrices calculations or other trigonometric calculations, there are some very savvy people in the materials that have chewed us the upstream work and this is where I want to talk to you about the bookstore Three.js.
The Three.js Bookstore
Three.js so it's a JavaScript library that will allow us to make 3D in the same way as Papervision3D could in ActionScript in Flash, but this time with the use of the technology of our choice for the rendering. The same code written with Three.js may therefore be used with Canvas (2D) or WebGL.
Attention however, WebGL uses hardware acceleration for the graphics card, more clever with the matrix calculations, what Canvas is unable. So there are big differences in performance between the use of both technologies. Canvas can therefore be used for relatively simple renderings so you won't see browser waver under the mass of calculations.
Start by downloading the library at the following address on the Github repository: https://github.com/mrdoob/three.js/ (click on Download ZIP).
Then initialize an HTML page as you used. In this page we will include the Three.js library and add a container in the body. And just before closing the body we add a script tag in which we will insert the JavaScript code to initialize our 3D scene.
<!doctype html>
<html>
  <head>
    <title>Mon premier rendu 3D avec Three.js</title>
    <meta charset="utf-8">
    <link  href="css/main.css" rel="stylesheet"/>
  </head>
<body>

  <div id="container"></div>

  <script src="http://mrdoob.github.com/three.js/build/three.min.js"></script>
  <script type="text/javascript">
  <!-- C'est ici que nous utiliserons Three.js -->
  </script>
</body>
</html>
We initialize our scene with the following code:
var renderer, scene, camera, mesh;

init();

function init(){
    // on initialise le moteur de rendu
    renderer = new THREE.WebGLRenderer();

    // si WebGL ne fonctionne pas sur votre navigateur vous pouvez utiliser le moteur de rendu Canvas à la place
    // renderer = new THREE.CanvasRenderer();
    renderer.setSize( window.innerWidth, window.innerHeight );
    document.getElementById('container').appendChild(renderer.domElement);

    // on initialise la scène
    scene = new THREE.Scene();

    // on initialise la camera que l’on place ensuite sur la scène
    camera = new THREE.PerspectiveCamera(50, window.innerWidth / window.innerHeight, 1, 10000 );
    camera.position.set(0, 0, 1000);
    scene.add(camera);

    // on créé un  cube au quel on définie un matériau puis on l’ajoute à la scène
    var geometry = new THREE.CubeGeometry( 200, 200, 200 );
    var material = new THREE.MeshBasicMaterial( { color: 0xff0000, wireframe: true } );
    mesh = new THREE.Mesh( geometry, material );
    scene.add( mesh );

    // on effectue le rendu de la scène
    renderer.render( scene, camera );
}
These functions do not come from nothing, you can find them in the documentation Three.js.
And there, oh magic, you should see... a red cube.
"All for you" you say? Yes, but this square is in 3D. So, if I can assure you, and I'll even prove it! To realize, nothing better than to turn on him even. We start by adding an
animate() function that will be called recursively to update the attributes of the object to animate.function animate(){
requestAnimationFrame( animate );
mesh.rotation.x += 0.01;
mesh.rotation.y += 0.02;
renderer.render( scene, camera );
}
Add a call to this function just after the call to the function
init() previous, then we can now remove the function of rendering in the init() function because the appeal is now via the animate(). This is the final code:var renderer, scene, camera, mesh;
init();
animate();
function init(){
// on initialise le moteur de rendu
renderer = new THREE.WebGLRenderer();
// si WebGL ne fonctionne pas sur votre navigateur vous pouvez utiliser le moteur de rendu Canvas à la place
// renderer = new THREE.CanvasRenderer();
renderer.setSize( window.innerWidth, window.innerHeight );
document.getElementById('container').appendChild(renderer.domElement);
// on initialise la scène
scene = new THREE.Scene();
// on initialise la camera que l’on place ensuite sur la scène
camera = new THREE.PerspectiveCamera(50, window.innerWidth / window.innerHeight, 1, 10000 );
camera.position.set(0, 0, 1000);
scene.add(camera);
// on créé un cube au quel on définie un matériau puis on l’ajoute à la scène
var geometry = new THREE.CubeGeometry( 200, 200, 200 );
var material = new THREE.MeshBasicMaterial( { color: 0xff0000, wireframe: true } );
mesh = new THREE.Mesh( geometry, material );
scene.add( mesh );
}
function animate(){
// on appel la fonction animate() récursivement à chaque frame
requestAnimationFrame( animate );
// on fait tourner le cube sur ses axes x et y
mesh.rotation.x += 0.01;
mesh.rotation.y += 0.02;
// on effectue le rendu de la scène
renderer.render( scene, camera );
}
Refresh the page and you should now see the cube turning on him even. Congratulations, you now do a real 3D animation in your browser!
Textures and lighting
A last small step will be replacing our cube in a sphere and to him apply a texture (JPEG image) we will illuminate with a directional light to give a bit of cachet to it.
So, we will replace the part concerning the creation of the cube with the following code:
// on créé la sphère et on lui applique une texture sous forme d’image
var geometry = new THREE.SphereGeometry( 200, 32, 32 );
var material = new THREE.MeshBasicMaterial( { map: THREE.ImageUtils.loadTexture('metal.jpg', new THREE.SphericalReflectionMapping()), overdraw: true } );
mesh = new THREE.Mesh( geometry, material );
scene.add( mesh );

// on ajoute une lumière blanche
var lumiere = new THREE.DirectionalLight( 0xffffff, 1.0 );
lumiere.position.set( 0, 0, 400 );
scene.add( lumiere );
There you go! You have a metal sphere that turns on even with a fine light reflection. See the source code of the demo for good view the different parties involved.
Conclusion
We'll stop here for now. Just know the bookstore allows a lot of freedom. You can for example:
- load 3D objects modeled with your 3D modeling software preferred (3DS Max, Maya, Blender...) and exported to Collada format for import in your scene, and then animate them.
- connect events JavaScript keyboard/mouse (onclick, onkeypress...) to drive the 3D view
- use the API Gamepad to control your games with a game, or even still Point Lock for the mouse.
Technically it is quite possible to make a complete 3D like Doom or Quake 2 video games.
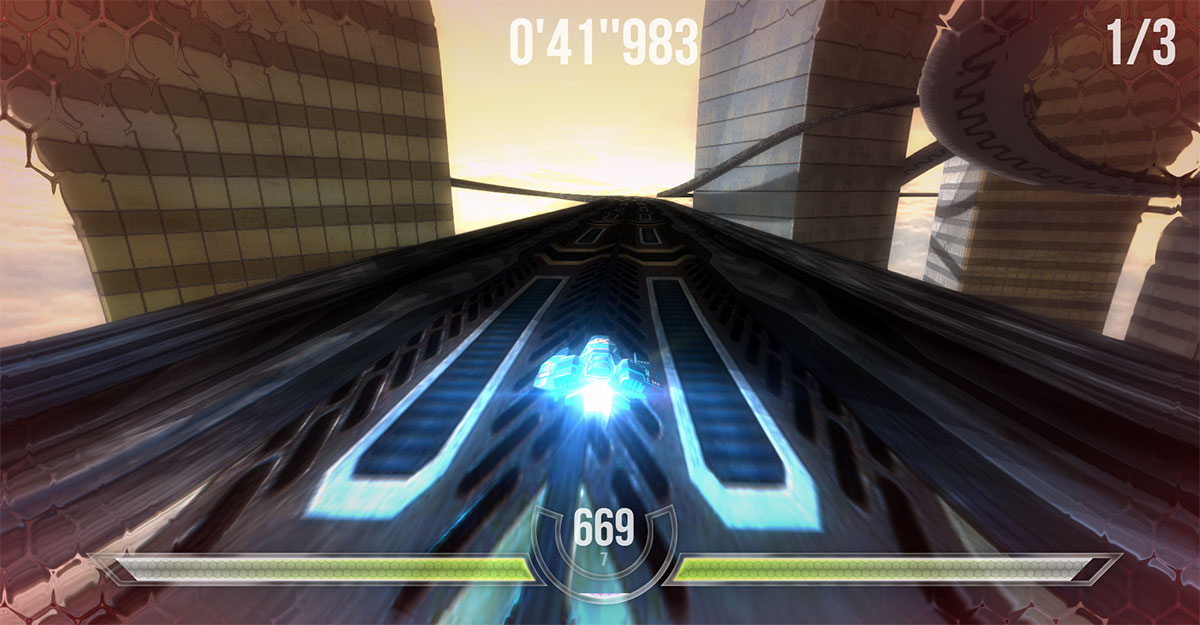
We can also mention the excellent work of Thibaut Despoulain , who made a great racing game by the name of HexGL with Three.js and HTML5.
Heck, it would be conceivable to Texturize a 3D object with a video via Video of HTML5 API which could she even rely on the API WebRTC and the
getUserMedia() method to capture the webcam of the user (what's the use to do this? I don't know but it's a good example of the complementarity of the new HTML5 components).


Post a Comment