How to Mount a Computer
Mount a computer, assemble a pc, it seems difficult and yet no! It's just long. Time of realization: from 1 to 4 hours according to experience.
Buy parts to mount a computer:
First of all to mount a computer, you have to buy all the components that you will assemble in a box. This case and commonly called computer tower.
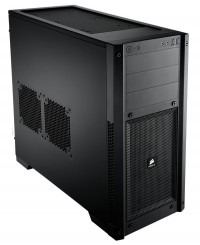
Here is the list of parts you will need:
- A case (often in ATX format, it depends on the motherboard)
- A diet
- A motherboard
- A processor (one that is compatible with the motherboard)
- Memory card (s) (also compatible with the motherboard)
- A graphics card
- DVD player or DVD burner
- a hard drive
Computer assembly and assembly:
first step: Prepare the case
Open the housing, for this it is very often necessary to remove the two or three screws that hold the left side cover from the back, slide it and remove it. If the case does not open like this, refer to the instructions.
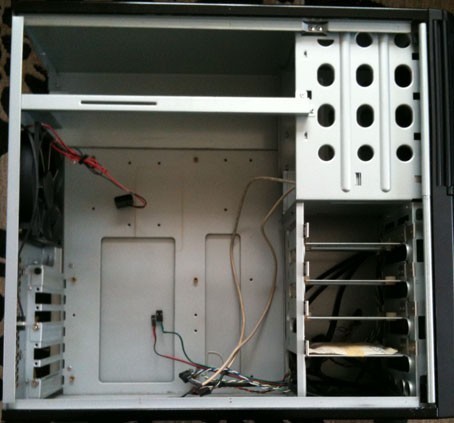
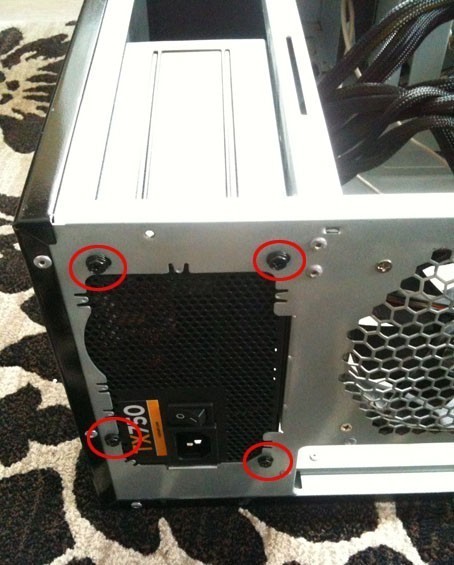
Then, if your box does not have a power supply, put the one you bought in place. The positioning of the screws does not allow you to go wrong in the mounting direction. The power supply unit is fastened externally, with the same type of screw as the one holding the cover.
Once the power supply is in place, you must also place the support screws on the motherboard.
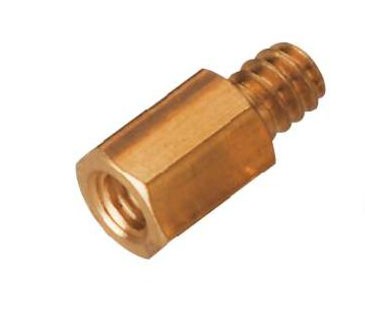
The housing has many small holes on the support plate, it is then necessary to place these small screws according to the holes of the motherboard. (To help you, you can place the motherboard in the case to see which holes to use.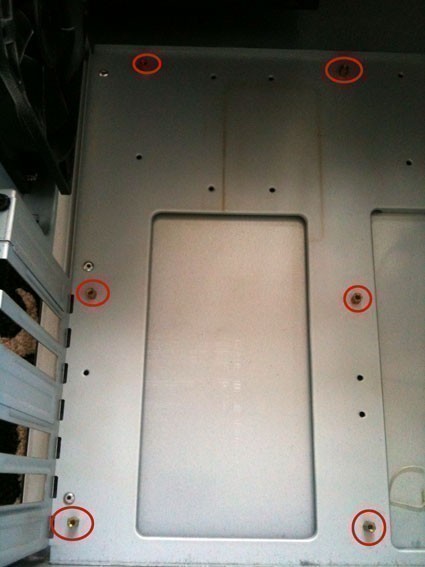

Finally we must also set up a small metal plate supplied with the motherboard, this plate is fixed / clip from the inside to the back of the case. It is from this place that will come out the different connectors of the motherboard. (mouse, keyboard, usb etc ...)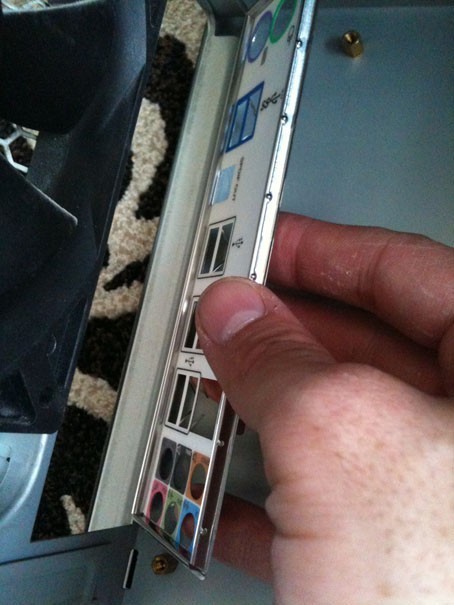

Step Two: Motherboard, CPU and RAM Assembly
Once the case is well prepared, you must assemble the trio (motherboard, RAM memory stick, and processor.For this, put your motherboard flat on a table.
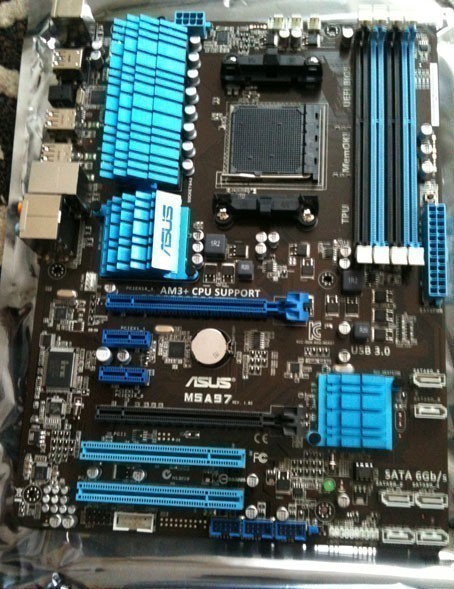
Then open your processor slot, very often a small rod on the side of the processor support must shift a little on the side before you can raise it. Once this rod is up, place your processor. He must come back on his own, he must not be forced. Some keys are located under the processor, and sometimes even on the side (small notches),
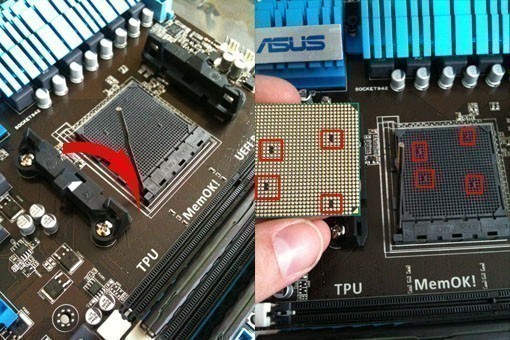
Once the processor is fully seated, close the compartment and lower the small closing bar again. If it seems difficult, it's normal, do not be afraid to push hard to close.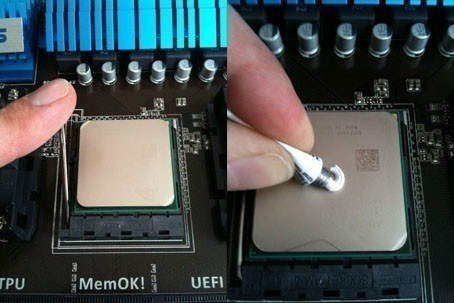

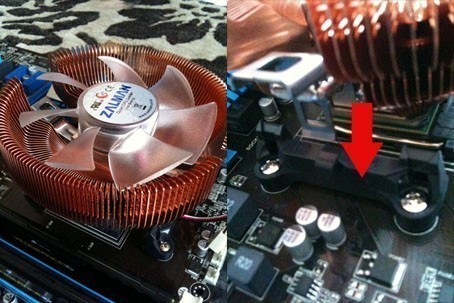
Now that the processor is in place and secure. You must put on it a fan-radiator (venti-rad) to cool it, because it heats up a lot. If you use the original fan, delivered with the processor, the thermal tab is normally already in place, in the form of a small viscous square, below the radiator. If you have bought a larger and more powerful venti-rad, in this case it is definitely necessary to buy and install a thermal paw nugget on the processor. No need to spread it, the fixing pressure of the radiator will take care of it. Fix your venti-rad, using its fixation, it is possible that you need a screwdriver flat for this manipulation. (be careful not to rip on the motherboard)
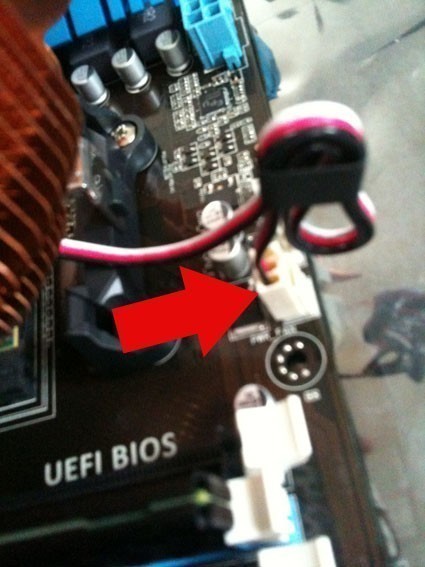
Once the venti-rad in place connect it to the motherboard (The connector must be named CPU_Fan or something like that). If you connect your venti-rad to another power connector, it will work but at each boot you will get an error message stating that you have a problem with the CPU fan (processor).
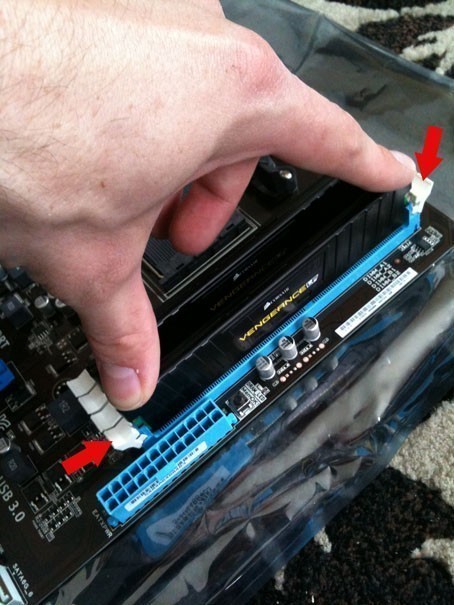
All that remains is to put the memory modules in place. Attention to the meaning, look at the notch in the middle of the connections of the bars. This avoids putting the bar in the wrong direction. Open the flaps on both sides of the memory slots on the motherboard. If you have two bars and there are four memory slots, you have to use those that go together (usually the same color). Position your memory stick well in the slot rail, then press hard on both sides of the bar until "click" of the two valves,
Step Three: Installing the motherboard into the enclosure
For that, hold the motherboard by the processor fan, it holds well, do not worry. Place it at an angle, so that the side connectors of the motherboard are placed first in the plate that you put in step 1.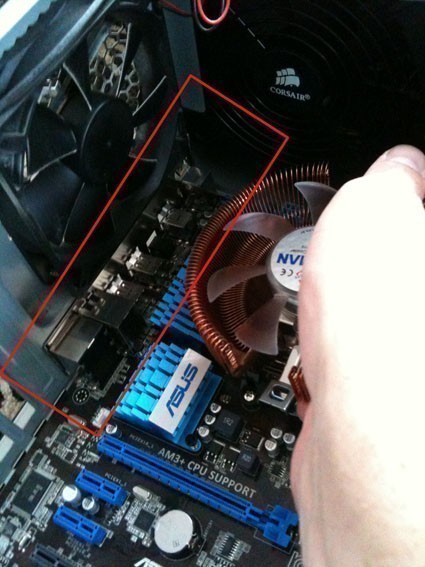

Finally you can fold down the motherboard on the support screws. Now, screw the screws from the motherboard into the places where you put the support screws previously.
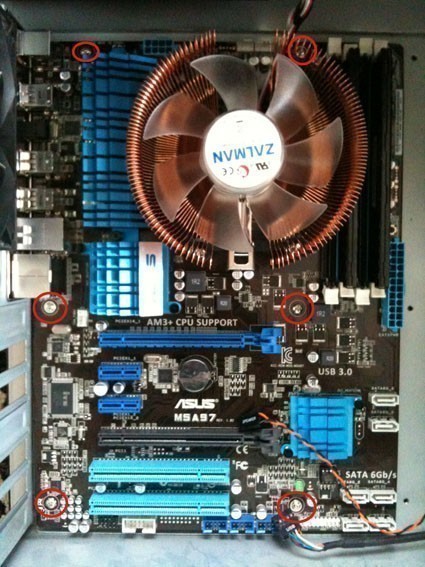
Now that your motherboard is attached to the case, connect the power supply to it. The big pin and the smaller one usually near the processor. You can not go wrong because the connections also have a meaning and a form of connection depending on the voltage.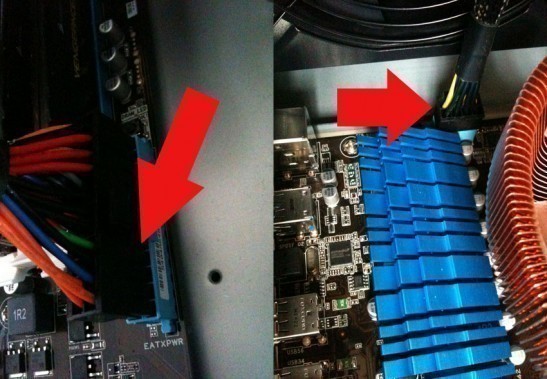

Also put in place The graphics card , be careful to get it into its slot, AGP but now most often PCI-Express. (See Image). Do not forget to screw it to the case.
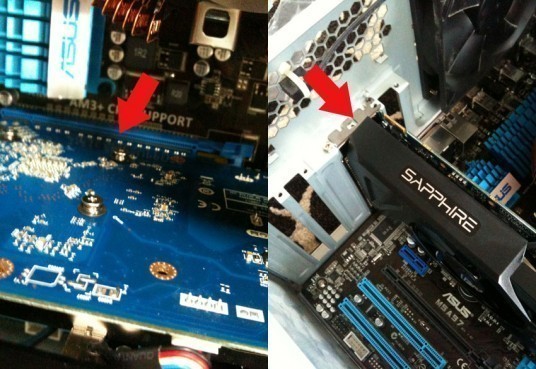
The high-end and powerful graphics cards also need to be connected to the general power supply.
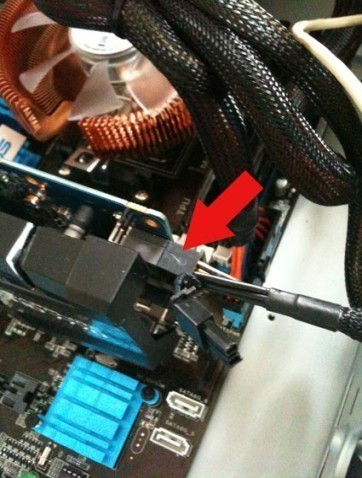
Step Four: Connecting Hard Drives, CD / DVD / Bluray Drive
To do this, use the Sata Tablecloths (cables) supplied with the motherboard and simply plug them in the right direction.
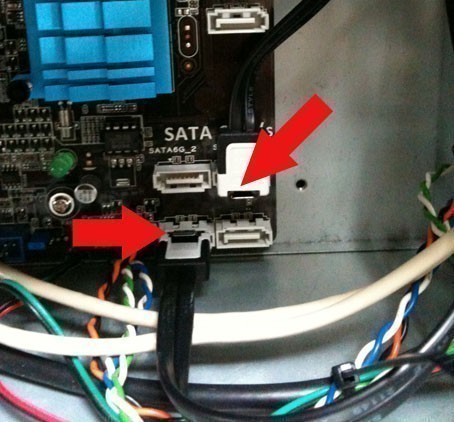
Then, on the other side, do the same. Also connect the power supply to hard drives and optical drives.
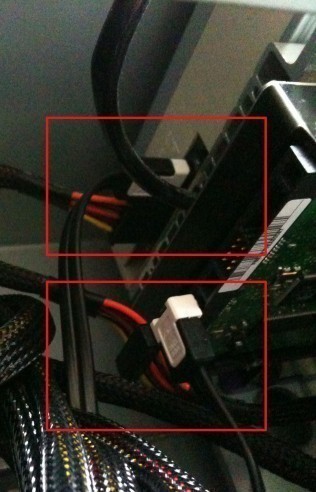
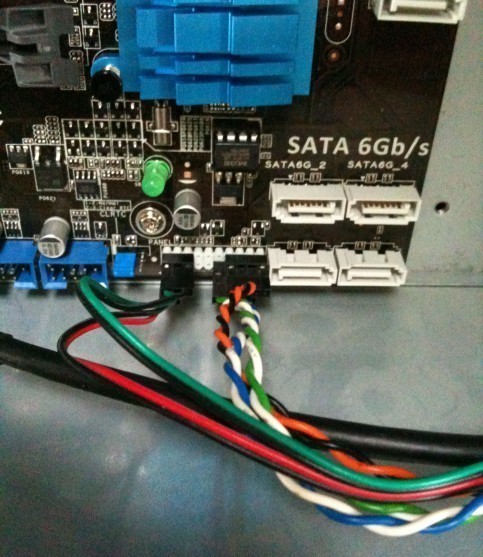
Fifth step: The connection of the buttons and lights in front of the tower. For this refer to the manual or the motherboard directly, in general, are written legends branch just below the connector.See the photo below: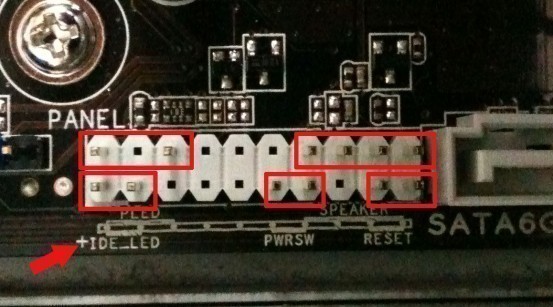

Here we first notice a + on the left, which means that for each branch the + is on the left (sometimes the signs of polarity are different for each branch, so it is repeated next to each legend). For the rest of the explanations of the photo: PLED (Power led), the place where we will connect the ignition LED of the tower IDE_LED: connect here the led of the hard drive, the one that will flash when it work PWRSW (Power switch), the computer ignition button RESET: The restart button. SPEAKER: The small speaker built into the tower that beeps at startup.
Be careful not to leave screws or screwdrivers in the tower, and to check that no cable is dragging in the passage of the fans. You can close the case and turn on your computer.
Finally you can install Windows or linux, Put the drive in the drive and follow the instructions:
I advise you to install windows 7 which is definitely better in my opinion than windows 8 or windows 10


Post a Comment